Most of the heat escaping from UK homes right now is leaving through gaps you could seal with a £3 roll of brush strip, not through the walls and windows that tend to get all the attention. I have spent fifteen years visiting homes across the UK for this site, from draughty Victorian end-of-terraces in Manchester to 1960s semis in the East Midlands, and the same pattern appears again and again. Homeowners have spent thousands on new radiators or upgraded boilers, yet they are still sitting in rooms that feel rawly cold because cold air is tracking silently across the floor from an unsealed skirting board junction, or pouring down from an uninsulated loft hatch above the landing.
You can keep a house warmer without extra heating by sealing draughts at skirting boards and loft hatches first, a £3 roll of brush strip often has more impact than a new boiler setting. Start with draught-proofing this weekend, then add thermal curtain liners and check individual room temperatures to trace remaining cold spots.
- Seal skirting board junctions and floor gaps with brush strip or silicone sealant, a £3 roll can make a measurable difference to room temperature within hours.
- Fit a draught-proof cover or insulated cap to your loft hatch this weekend; an unsealed hatch loses roughly as much heat as leaving a window open all winter.
- Check for cold air tracking across floors at night using a candle or incense stick held near skirting boards, door frames and window reveals.
- Add a heavy thermal curtain liner (available from £8 per panel) to existing curtains rather than replacing windows, it addresses radiant heat loss at a fraction of the cost.
- Reposition furniture so sofas and chairs are away from external walls; sitting close to a cold wall significantly increases perceived cold through radiant heat loss even at normal air temperatures.
- Apply self-adhesive foam or wiper seals to all exterior doors, including the door between your garage and living space, as these are frequently overlooked draught sources.
- Use a thermometer to check individual room temperatures rather than relying on a single thermostat reading, a 2°C gap between rooms usually points to a specific draught or insulation fault you can fix.
- Why Your Home Feels Cold Even When the Heating Is On
- What Keeping Heat In Actually Means in a UK Home
- The Zero-Cost Actions That Make an Immediate Difference
- Draught-Proofing, The Highest-Impact Low-Cost Fix Available
- Low-Cost Insulation Upgrades That Pay Back Quickly
- What Surprised Homeowners When They Actually Did This
- Comparing the Options, Impact, Cost, and Effort at a Glance
- Grants and Support Available in the UK in 2026
You can keep a house noticeably warmer without turning up the heating by addressing heat loss at source, sealing draughts, adding thin insulation where it is currently absent, and changing a handful of daily habits that most of us have never thought to question. The actions in this guide are ranked by actual thermal impact, not by how impressive they sound, and most can be completed this weekend for under £50.
This is not a list of vague suggestions. Every section explains why something works, what it costs in 2026, and, critically, where it will not make much difference. Knowing when to bother and when to walk away is just as useful as knowing what to buy.
Why Your Home Feels Cold Even When the Heating Is On
The thermostat reading and the temperature your body actually experiences are two entirely different things, and understanding the gap between them is the key to solving cold homes without simply throwing more fuel at the problem.
A room can register a perfectly respectable 20°C on a digital thermostat and still feel significantly colder than that. The reason is that your body does not only exchange heat with the air around it, it also loses heat through thermal radiation, meaning your body is constantly emitting infrared heat toward colder surfaces nearby. If the walls in a Victorian terrace with 9-inch solid brick are at 12°C, the single-glazed sash window is at 8°C, and the suspended timber floor has cold air flowing beneath it, those surfaces are drawing heat away from your body continuously, regardless of what the air thermometer says. Physicists refer to this as the mean radiant temperature effect, and it is the reason people in poorly insulated older homes consistently report feeling cold even when they have “the heating on full.”
The cold surface effect is something I rarely see discussed in mainstream energy-saving content, yet it is fundamental to understanding why draught-proofing and insulation matter so much more than people expect. When you insulate a wall or floor, you are not just stopping air movement, you are raising the surface temperature of the room’s internal envelope, which directly raises the temperature your body perceives, often by more than the air temperature would suggest.
Thermal mass is a related concept worth understanding. Materials like brick, stone, and concrete absorb heat slowly and release it slowly. In a well-heated home, this is beneficial, walls store warmth and release it overnight. But in a home that is heated intermittently or has been left cold for several days, those same walls become heat sinks that take a long time to warm up. This is why turning the heating on for an hour in a cold Victorian house barely makes a dent, the walls are absorbing a significant proportion of the energy before any of it reaches the air. Continuous low-level heating is thermally more efficient in high-thermal-mass homes than short sharp blasts, though the right balance depends on your tariff and usage pattern.
guide to understanding your home's EPC rating and what it actually means
What Keeping Heat In Actually Means in a UK Home
Heat retention means slowing the rate at which warmth escapes through your home’s building envelope, the collective term for every surface that separates the inside of your home from outside, including walls, the roof, the ground floor, windows, doors, and every gap between them.
There are three physical mechanisms through which UK homes lose heat, and it is worth understanding all three because different fixes address different mechanisms.
- Conduction is the transfer of heat through solid materials. Heat moves from the warm inside surface of a wall or floor through the material itself toward the colder outside surface. The thicker and less thermally conductive the material, the slower this transfer. Insulation works by introducing materials with very low thermal conductivity, mineral wool, rigid foam, sheep’s wool, into the building envelope.
- Convection is heat being carried away by moving air. Every gap, crack, and unsealed joint in your home’s envelope allows warm internal air to escape and cold external air to enter. This is draught loss, and it accounts for a surprisingly large proportion of total heat loss in pre-1980s UK housing stock.
- Radiation is the emission of infrared heat from warm surfaces toward cold ones, as described in the previous section. Reflective materials, foil-backed insulation, reflective radiator panels, work by interrupting this transfer.
A common misconception worth clearing up immediately is that insulation generates warmth. It does not. Insulation simply slows the speed at which warmth you have already created bleeds away into the cold outside. The warmer your home already is relative to outside, the harder heat is working to escape, which is why every degree you can reduce that gradient, through insulation or draught-proofing, has a compounding effect on your fuel bills.
UK homes built before 1980 are structurally poor at retaining heat by modern standards because building regulations simply did not require adequate insulation levels. A typical Victorian or Edwardian terrace has solid brick walls with no cavity, single-glazed sash windows, suspended timber floors with ventilation gaps to the cold sub-floor void, and chimneys built to draw air out continuously. Even 1960s and 1970s builds, which introduced cavity walls, often have those cavities unfilled, and may have loft insulation that has never been topped up since original installation. According to the Energy Saving Trust, a significant proportion of homes across England, Wales, and Scotland still fall into EPC bands D, E, or below, meaning they are among the least thermally efficient housing stock in Northern Europe.
The Zero-Cost Actions That Make an Immediate Difference
Before spending a single pound, there are behavioural and rearrangement changes that have a genuine effect on how warm your home feels. These are not filler tips, they are grounded in the physics explained above.
Close Internal Doors and Use Curtains as Thermal Tools
Closing the doors to rooms you are not using concentrates your heating output in the spaces where people actually live. A typical 3-bed semi with the living room, kitchen, hallway, and three bedrooms all being heated simultaneously is heating significantly more air volume than necessary. Close the bedroom doors during the day, close the dining room door if you are only using the living room, and your existing heat output will warm the occupied space faster and keep it warmer longer.
Curtains deserve more respect than they usually get. The critical timing point, missed by almost every list of “winter tips” online, is that curtains should be closed at dusk rather than after dark. Once the sun has gone down and outside temperatures start to drop, a single-glazed or older double-glazed window rapidly becomes a cold surface. Drawing the curtain at dusk traps residual warmth between the glass and the fabric before the glass has had a chance to cool significantly. Waiting until 9pm to close the curtains means you have already lost two to three hours of radiant heat loss through the glass.
Move the Sofa Away from the Radiator
In the majority of UK living rooms I have visited, the sofa sits either directly against or within 10–15 centimetres of the radiator on the external wall. This is understandable, it is where the furniture fits, but it means the radiator is heating the back of the sofa rather than the room. The sofa fabric absorbs heat that should be convecting upward and circulating into the living space. Moving a three-seat sofa 30 centimetres forward costs nothing and measurably improves the convective circulation in the room. The difference is particularly pronounced in rooms with alcove radiators that are partially boxed in.
Put Rugs on Hard Floors
Bare floorboards and ceramic tiles feel cold underfoot not because they are particularly cold in absolute terms, but because they conduct heat away from the soles of your feet very rapidly. Your brain interprets this rapid heat transfer as cold. A rug, even a thin one, introduces a layer of low-conductivity material that dramatically slows this transfer. The rug does not need to be thick or expensive to work. A flat-woven cotton rug makes a noticeable difference. This is particularly relevant in homes with suspended timber floors where cold air from below is genuinely dropping the floor surface temperature.
Reverse Ceiling Fans if You Have Them
This is the zero-cost tip that genuinely surprises most UK homeowners, partly because ceiling fans are less common here than in other countries and partly because the function is almost never discussed. Warm air rises and pools at ceiling height, in a room with a standard 2.4-metre ceiling, the top 30 centimetres of air can be 2–3°C warmer than the air at sitting height. Ceiling fans in the UK are typically installed with a direction switch. In summer, the fan turns counterclockwise (viewed from below) to push air down and create a cooling draught. In winter, switching the fan to turn clockwise creates a gentle updraft at the blades, which pulls cold air from floor level up and pushes the warm ceiling-level air down the walls and back into the living space. No draught is felt directly, but the room temperature evens out noticeably. If you have a ceiling fan and have never checked whether it has a reverse switch, check now, it is usually a small toggle on the motor housing.
Draught-Proofing, The Highest-Impact Low-Cost Fix Available
Draught-proofing is the single best-value action a UK homeowner can take to feel warmer without raising the thermostat, and it is consistently underestimated because the fixes look unglamorous compared to new windows or a heat pump.
According to the Energy Saving Trust, draught-proofing throughout a home can save a typical detached household in the region of £45–£65 per year on energy bills. In a terraced house, where fewer external walls mean a smaller total envelope, savings may be lower, but the comfort improvement can be more pronounced because the remaining gaps are proportionally more impactful.
The Five Locations Most Commonly Missed
Doors and windows are the obvious targets, and most homeowners address these eventually. The following five locations are the ones that DIY draught-proofing typically misses entirely, yet they frequently account for more total air infiltration than the doors and windows combined.
- Skirting board and floor-to-wall junctions. In older homes, the gap between the bottom of the skirting board and the floorboards is a direct route into the sub-floor void. In Victorian terraces with suspended floors, this void connects to the outside through airbricks. Sealing this junction with silicone decorator’s caulk is a job of a few hours and costs under £10 in materials. Run your hand along the skirting board on a cold day and you will often feel cold air moving.
- Loft hatch edges. The loft hatch is typically a plywood board sitting in an unlined timber frame, with no draught seal whatsoever. Warm air rises through the gap around the edge continuously. Fitting self-adhesive foam or, better, a compression seal around the hatch perimeter takes under an hour and costs around £5–£10. This single fix regularly makes upstairs landings and bedrooms noticeably warmer in Victorian and post-war terraces.
- Letterboxes. An unsealed letterbox is essentially a permanently open hole in your front door. Letterbox draught excluders, brush-type internal flap covers, cost around £8–£15 and are straightforward to fit. If your door already has a metal flap, check that it is seating properly and has not warped.
- Unused chimneys. An open chimney creates a powerful convective draw, warm room air rises up the flue continuously, drawing cold air in through other gaps to replace it. A chimney balloon (a purpose-made inflatable draught excluder inserted into the flue) costs around £20–£25 and eliminates this air movement entirely. Leave the label hanging down so it is visible, if you ever light a fire without removing the balloon first, the consequences will be immediately apparent.
- Gaps around pipes through external walls. Gas pipes, waste pipes, and boiler flue penetrations through external walls are routinely left with visible gaps around them. These are simple to fill with exterior-grade silicone sealant. Each gap is small, but collectively they add up.
DIY Versus Professional Draught-Proofing
A full DIY draught-proofing kit for an average 3-bed house, brush strips for two or three doors, foam tape, a chimney balloon, silicone sealant, and a letterbox cover, typically costs under £50 in 2026 and can be completed over a weekend. Professional draught-proofing, where a tradesperson surveys the whole envelope and seals systematically, typically costs £200–£350 for a whole house and may be partially supported through local authority schemes in some areas.
One practical note from installer experience worth taking seriously: the self-adhesive foam strip that comes in most basic draught-proofing kits compresses within a single heating season as the door is opened and closed repeatedly, and within twelve months it is no longer creating a meaningful seal. Brush strips for door frames, or silicone-based compression seals, cost slightly more, perhaps £12–£18 per door versus £3–£5, but last four to eight years without losing effectiveness. The foam strips are not worth fitting if you can afford the brush alternative.
complete guide to draught-proofing your home room by room
Low-Cost Insulation Upgrades That Pay Back Quickly
Beyond draught-proofing, there are several insulation improvements that fall into the genuinely affordable category and pay back within a single winter or within a few years at most.
Loft Insulation Top-Up to 270mm
The current recommended depth for mineral wool loft insulation in the UK is 270mm. Homes built or last insulated before 2000 frequently have 100mm or less in place. Topping up to 270mm is a DIY job that most physically able homeowners can complete in a weekend, the material is available in rolls from builders’ merchants and DIY stores at roughly £5–£8 per square metre in 2026. A typical semi-detached house has around 50 square metres of loft floor, so the material cost for a top-up is in the region of £250–£400. Professional fitting adds labour costs of roughly the same amount again, but is worth considering if the loft has awkward joists, water tanks, or poor access.
The payback case is strong. According to the Energy Saving Trust, topping up loft insulation from 100mm to 270mm in a typical semi-detached home can save in the region of £150–£200 per year on heating bills. On material-only costs, that is a payback of under two years.
Hot Water Cylinder Jacket
An uninsulated or inadequately jacketed hot water cylinder loses heat to the surrounding space continuously, twenty-four hours a day. The heat this produces in the airing cupboard is not warming any room you are using, it is simply wasted. A 75mm British Standard jacket, which is the minimum recommended thickness, costs around £15–£25 in 2026 and takes under thirty minutes to fit without any specialist tools. The Energy Saving Trust estimates this can save around £35–£55 per year depending on cylinder size and usage. At that rate, the jacket pays for itself within the first month of use. If your cylinder already has a jacket but it is thin, flattened, or torn, replace it, a degraded jacket loses much of its effectiveness.
Reflective Radiator Panels
This is one of the genuinely under-discussed fixes for solid-walled homes. In a Victorian or Edwardian terrace with 9-inch solid brick walls, the radiator on an external wall is heating not just the room but also the wall behind it. Fitting foil-backed reflective panels between the radiator and the wall reflects infrared heat back into the room rather than allowing it to conduct through 230mm of brick. Packs suitable for three or four radiators cost around £10–£20 and take under an hour to fit without removing the radiators. The effect is proportionally greater in solid-walled homes than in cavity-walled ones, but even in 1970s homes with unfilled cavities, there is a measurable benefit. This fix is most cost-effective in the rooms with the largest external-wall radiators.
Thermal Curtain Liners
Buying new thermal curtains is an expensive and often unnecessary step if your existing curtains are in good condition. Clip-in thermal lining panels, fabric backed with a reflective or high-density layer, attach behind existing curtains using curtain-ring clips and cost roughly £15–£40 per window depending on size. Independent testing suggests they perform comparably to purpose-made thermal curtains in reducing window heat loss. In a room with four windows, this approach costs £60–£160 versus potentially £400–£800 to replace all the curtains. For bay windows in Victorian homes, where a large area of glass dominates the front room, thermal liners offer meaningful improvement for a modest investment.
guide to window heat loss and the most effective secondary glazing options
What Surprised Homeowners When They Actually Did This
Across fifteen years of visiting homes in various stages of improvement, a few consistent surprises come up when homeowners who have gone through this process reflect on what actually changed things for them.
It Is Rarely the Big Measures That Make the Immediate Difference
The homeowners who have been quoted £8,000–£15,000 for external wall insulation on their solid-brick terrace are often convinced that nothing short of a major installation will make their home comfortable. In several cases I have observed, draught-proofing the loft hatch, sealing the skirting board junctions in the hall, and fitting a chimney balloon in the front bedroom fireplace made the upstairs bedrooms measurably warmer within a week, without any of the disruption or cost of the larger measures. The big insulation projects matter for long-term energy bills and carbon reduction, but the immediate comfort wins come from plugging the holes, not necessarily from adding insulation to the structure.
Humidity Matters More Than Almost Anyone Mentions
This is perhaps the most consistently overlooked factor in cold-feeling homes. Damp air feels colder than dry air at the same temperature because moisture in the air conducts heat away from your skin faster than dry air does. In homes with condensation problems, streaming windows in the morning, damp patches near the ceiling, that slightly musty smell, the indoor temperature feels several degrees lower than the thermostat reads. Paradoxically, improving ventilation in these homes (trickle vents on windows, occasional short sharp cross-ventilation rather than windows left slightly open all day) reduces relative humidity and makes the home feel warmer, even though you are technically letting cold air in. If your home has persistent condensation, addressing that problem will improve perceived warmth as much as many physical fixes.
The Loft Hatch Effect Is Underestimated
Installers who work through Trustmark-accredited insulation programmes consistently note the same observation: homeowners run their heating for longer in the morning and evening to compensate for the rapid heat loss through an unsealed loft hatch on the landing. The landing is often the coldest space in the house, which then cools the adjacent bedrooms. Sealing the hatch costs under £10 and thirty minutes. In a typical post-war semi with a landing hatch, the upstairs temperature difference can be 2–3°C once the hatch is sealed, which is often the difference between a comfortable night and a miserable one.
The Victorian Suspended Floor Problem
In pre-1920 homes with original suspended timber floors, there is commonly significant airflow beneath the floorboards, originating from the ventilated sub-floor void that connects to outside airbricks. This is intentional, the ventilation prevents timber rot, but it also means the floor surface can be genuinely cold. The conventional solution is fitting insulation between the floor joists from below, which requires access via a cellar or lifting boards. Where that is not practical, running a bead of decorator’s caulk along each board-to-board gap and the perimeter gap at the skirting board significantly reduces the draughts coming up through the floor without compromising the sub-floor ventilation at the airbrick level. This is a fix I rarely see recommended but that makes a tangible difference in Victorian terraces where the ground floor always feels inexplicably cold despite adequate heating.
Comparing the Options, Impact, Cost, and Effort at a Glance
The table below summarises the main actions covered in this guide. Costs reflect 2026 prices for materials or professional installation. Warmth impact ratings are relative assessments based on typical outcomes in UK housing types, actual results vary depending on the specific home.
| Action | Typical Cost 2026 | DIY or Professional | Warmth Impact | Approx. Payback Period | Best Suited To |
|---|---|---|---|---|---|
| Draught-proofing doors and windows (brush strips, silicone) | £20–£50 materials | DIY | High | Under 1 year | All pre-2000 homes |
| Chimney balloon or draught excluder for unused fireplace | £20–£25 | DIY | High (for rooms with open chimneys) | Under 1 year | Victorian and Edwardian homes with original fireplaces |
| Loft insulation top-up to 270mm | £250–£400 DIY materials; £500–£750 fitted | DIY or professional | High | 1–3 years | Homes with less than 270mm existing insulation |
| Reflective radiator panels | £10–£20 per pack | DIY | Moderate (higher in solid-walled homes) | 1–2 years | Victorian and Edwardian solid-brick terraces |
| Thermal curtain liners | £15–£40 per window | DIY | Moderate | 1–3 years | Rooms with large or single-glazed windows |
| Hot water cylinder jacket (75mm British Standard) | £15–£25 | DIY | Low (comfort indirect, reduces heat waste) | Under 1 month | Homes with unvented or older cylinder systems |
| Draught-proofing skirting boards and loft hatch | Under £15 | DIY | High (particularly upstairs) | Immediate | Pre-1980 homes with suspended floors or poorly sealed hatches |
| Rearranging furniture and adding rugs (zero cost) | £0 | DIY | Moderate (perceived warmth) | Immediate | All homes |
Grants and Support Available in the UK in 2026
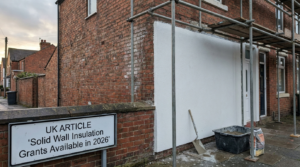
Several government-backed schemes can help UK homeowners fund larger insulation measures, and while none of these cover the DIY fixes described above, they are worth understanding because they can remove the cost barrier to the structural improvements that deliver the biggest long-term energy savings.
ECO4 (Energy Company Obligation 4)
ECO4 is the government’s primary fuel poverty and home insulation scheme, administered through energy suppliers and overseen by Ofgem. It is available to households on qualifying means-tested benefits, including Universal Credit, Pension Credit, and several others, and to households referred by local authorities through the LA Flex route. Under ECO4, qualifying households can receive funded insulation including loft insulation, cavity wall insulation, and solid wall insulation at no cost to the homeowner. Measures must be installed by MCS-accredited or TrustMark-registered contractors. To apply, contact your energy supplier directly or ask your local authority whether they are running a referral programme.
Great British Insulation Scheme (GBIS)
The Great British Insulation Scheme has broader eligibility than ECO4 and is built to target the large pool of homes in lower EPC bands regardless of the occupant’s income or benefit status. Homes in EPC bands D or below, which covers a substantial proportion of the UK’s pre-1990 housing stock, may qualify for a single insulation measure, typically loft, cavity wall, or solid wall insulation. This is worth investigating even for working households who would not qualify for ECO4. Applications are made through energy suppliers or through the government’s Simple Energy Advice service. Eligibility is confirmed based on the property’s EPC band rather than household income alone, though income is also considered as a secondary factor for some measures.
Local Authority Flex and Council Schemes
Within the ECO4 framework, local councils have discretionary allocation, sometimes called LA Flex, to refer households who do not meet the standard benefit criteria but are in vulnerable or fuel-poor situations. This funding is often not publicly advertised, and homeowners who have been told they do not qualify for ECO4 based on their benefit status may still be eligible through this route. Contact your local council’s housing or energy efficiency team and ask specifically whether they are currently running an ECO4 LA Flex referral scheme. Councils receive this funding in phases, so availability varies, but it costs nothing to ask, and the results for some homeowners have been significant.
A Realistic Note on Timelines
Grant-funded insulation measures typically involve a survey, an eligibility check, installation booking, and the installation itself, a process that, in practice, can take anywhere from six weeks to several months from initial enquiry. The zero-cost and low-cost DIY actions described in this guide are not part of any grant scheme, but they are also the ones you can complete this weekend. If you are starting from a cold, draughty home this autumn, the practical approach is to draught-proof and insulate what you can immediately, and simultaneously start the application process for any grant measures you may be eligible for. The two approaches are not in competition, they work together, and the DIY fixes will reduce your bills and improve your comfort in the meantime.
how to apply for ECO4 and GBIS funding and what to expect from the process
Where to Start if Your Home Feels Unmanageably Cold
If this guide has left you wondering which action to prioritise first, the practical answer depends on your home type. In a Victorian or Edwardian terrace, start with the loft hatch seal, the chimney balloon for any unused fireplaces, and the skirting board junctions, these three fixes address the most common sources of convective heat loss in pre-1920 homes and can be completed for under £40 total. In a 1960s or 1970s semi, the priority is almost always the loft insulation depth if it has not been topped up in recent years, followed by door and window draught-proofing.
In any home, the honest truth is this: if your loft insulation is below 270mm, your loft hatch is unsealed, and you have open chimneys, those three issues alone are likely responsible for a substantial proportion of your heating bill. Fixing all three will cost under £500 even with professional help, and less than £100 if you do it yourself. No boiler upgrade, no heat pump, and no set of thermostatic radiator valves will compensate for those three gaps being open.
The homes I have visited that feel genuinely warm and cost relatively little to heat are not always the ones with the newest technology. They are consistently the ones where someone, at some point, took the time to work through the building envelope systematically and closed the gaps. That is the work worth doing first.
whole-house retrofit planning guide, what order to tackle improvements for maximum efficiency
The warmest homes I visit are not always the ones with the best boilers or the newest windows. They are the ones where every gap has been found and dealt with. Cold air does not respect expensive improvements if there is still a route in through the skirting board.
Frequently Asked Questions
The most effective steps are sealing draughts at skirting boards, door frames and loft hatches, adding thermal curtain liners, and insulating any exposed pipes or cold floors. Most UK homes lose a significant portion of heat through gaps that cost under £20 to seal. Addressing these before adjusting your thermostat will usually make a noticeable difference within a day.
Draught-proofing is consistently the highest-impact, lowest-cost option for UK homes. A roll of brush strip costs around £3 to £6, silicone sealant around £4, and self-adhesive door seals around £5 to £8 per door. The Energy Saving Trust estimates that draught-proofing a whole home typically costs £200 or less when professionally done, or far less as a DIY job.
Your body loses heat through thermal radiation to cold nearby surfaces, walls, windows and floors, not just through the air temperature. A room can read 20u00b0C but still feel cold if the surrounding surfaces are significantly colder. Improving wall insulation, adding thick curtains and draught-proofing gaps reduces this radiant heat loss and makes the same air temperature feel warmer.
Yes. The Energy Saving Trust estimates that draught-proofing skirting boards, floorboards and chimneys in a typical semi-detached home can save between £45 and £75 per year on energy bills. Draught-proofing a chimney alone can save around £65 a year. These figures reflect 2026 UK energy prices and will vary depending on home size and fuel type.
The Great British Insulation Scheme and ECO4 are the main available routes in 2026, targeting households with lower incomes or properties with an EPC rating of D or below. Eligible homeowners can receive free or heavily subsidised insulation measures. Contact your energy supplier or check the GOV.UK eligibility checker to see what you qualify for.