Most UK homes lose a surprisingly large amount of heat through gaps that are entirely preventable, and worn or damaged window weatherstripping is one of the most common culprits. Window weatherstrip replacement is a DIY job that costs as little as £5 to £30 in materials per window, yet its impact on comfort, energy bills, and noise levels can be felt immediately.
Window weatherstrip replacement is a straightforward DIY job that costs between £5 and £30 in materials per window, with most homeowners completing each one in under an hour using basic hand tools. The key requirement is matching the replacement seal exactly to the original profile in material, cross-section, and colour, an incorrect fit will not create an airtight seal and will need redoing. The Great British Insulation Scheme closed on 31 March 2026. It funded insulation measures only and never covered windows or glazing. For best results, inspect and replace worn seals before winter and test each finished window by closing it on a strip of paper to confirm the seal is working correctly.
- Budget £5 to £30 in materials per window for weatherstrip replacement — one of the most cost-effective draught-proofing upgrades available to UK homeowners
- Match the replacement seal profile exactly to the original in cross-section, material, and colour before purchasing to avoid a second trip to the supplier
- Complete each window in under an hour using basic hand tools — no trade qualifications or specialist knowledge are required
- Distinguish between weatherstripping (channel-fitted, integral) and draught excluders (surface-mounted) to ensure you buy the correct product for your window type
- The Great British Insulation Scheme closed on 31 March 2026. It funded insulation measures only and never covered windows or glazing.
- Inspect all window seals at the start of autumn so any replacements are in place before winter heating demand peaks
- Test the finished seal by closing the window on a thin piece of paper — resistance when pulling it out confirms an airtight fit
- Understanding Window Weatherstripping and What It Does
- How Replacing Weatherstripping Actually Improves Your Home
- Signs Your Window Weatherstripping Needs Replacing
- Types of Weatherstripping Used in UK Windows
- What to Look For When Choosing Replacement Weatherstrip
- Tools and Materials You Will Need
- Step-by-Step Guide to Replacing Window Weatherstrip
- Comparing Weatherstrip Types at a Glance
- When DIY Is Not Sufficient and Professional Help Is Needed
- Making Your Window Improvements Last
Replacing worn window weatherstripping restores an airtight seal between the moving sash or casement and the fixed frame, eliminating draughts, reducing heat loss, and lowering energy bills. Most UK homeowners can complete the job using basic hand tools in under an hour per window, with no specialist trade knowledge required. The correct replacement seal profile must match the original in cross-section, material, and colour for a lasting result.
Understanding Window Weatherstripping and What It Does
Window weatherstripping is the flexible sealing material fitted around window frames and opening sashes to block draughts, moisture, and noise from entering your home. It sits in the gap between the moving part of the window, known as the sash or casement, and the fixed outer frame. That gap exists for practical reasons: windows are manufactured to tolerances that allow for slight misalignment, and all materials expand and contract with temperature changes throughout the year. Without a compressible seal bridging that gap, every window would be a source of cold air and noise ingress.
It is worth being clear about the difference between weatherstripping and draught excluders, since the two terms are sometimes used interchangeably. Weatherstripping is permanently fitted into a channel or groove as part of the window’s designed construction, it is an integral component, not an afterthought. Draught excluders, by contrast, are typically temporary or surface-mounted additions applied on top of an existing frame. Both serve a similar purpose, but weatherstripping is the more durable and architecturally correct solution for windows.
All modern uPVC, timber, and aluminium windows in UK homes rely on compression or wiper-style seals to meet building regulations for thermal performance. When these seals degrade, whether through UV exposure, age, or the wrong cleaning products, the window’s thermal and acoustic performance drops noticeably. A window that once felt draught-free and quiet can become a significant weak point in your home’s thermal envelope without any change to the glass or frame itself.
Practical tip, before you do anything else, run a finger along the seal of every opening window in your home. If the rubber feels hard, flat, or crumbles slightly, it is almost certainly due for replacement.
How Replacing Weatherstripping Actually Improves Your Home
Replacing worn or damaged weatherstripping restores the window’s ability to form an airtight seal, reducing heat loss, cutting energy bills, and eliminating cold draughts at source. The improvement is immediate and measurable, rooms that previously felt cold near the windows retain heat more effectively, and the heating system does not need to compensate for the constant ingress of cold air.
According to Energy Saving Trust guidance, draughts through gaps around windows and doors are one of the most common causes of preventable heat loss in UK homes. Unlike replacing double-glazed units or upgrading to triple glazing, both of which involve significant expenditure, weatherstrip replacement addresses a specific, well-understood failure point at minimal cost. It is the kind of improvement that professional energy assessors consistently flag during home assessments, yet it remains undervalued because it lacks the headline appeal of solar panels or heat pumps.
A failed seal forces the heating system to work harder to maintain a comfortable indoor temperature. In 2026, with domestic energy costs continuing to fluctuate under the Ofgem price cap framework, reducing unnecessary heat loss has a direct and ongoing financial benefit. The more your home leaks heat, the more energy you consume, and the more you pay.
What makes weatherstrip replacement particularly worthwhile is its cost-to-benefit ratio. Materials for a standard window typically cost between £5 and £30 depending on the seal type and quantity required, and no specialist tools are needed. When compared with other energy-saving measures, cavity wall insulation, for example, costs £1,500 or more, the return on investment from properly sealed windows is exceptional. guide to draughtproofing doors and windows on a budget
Practical tip, replace the weatherstripping on your most-used rooms first, particularly north-facing windows and those in rooms where you spend the most time. You will notice the difference within days.
Signs Your Window Weatherstripping Needs Replacing
Identifying failing weatherstripping early means you can address the problem before it leads to damp, increased heating bills, or noticeable noise intrusion. There are several reliable indicators to look for.
Visible Deterioration
The most straightforward check is visual. Run a hand slowly along every seal on your opening windows and look for cracking, splitting, flattening, or sections of seal that have pulled away from the groove entirely. A healthy compression seal should feel soft and springy; a degraded seal feels hard, flat, or brittle. Even small gaps, a millimetre or two, are sufficient to allow meaningful air infiltration.
The Draught Test
Hold a lit candle or a thin strip of tissue paper around the window perimeter on a windy day, paying close attention to the join between the sash and the frame. Any flickering or movement in the flame or paper indicates air infiltration at that point. This simple test is surprisingly sensitive and will reveal gaps that are invisible to the eye.
Condensation Patterns
Moisture appearing between the frame and the sash, not between the double-glazed panes themselves, which indicates a failed unit seal, suggests the outer weatherstrip is no longer keeping weather out. This moisture can, over time, promote mould growth around the frame rebate and cause timber frames to rot.
Increased Noise
If outdoor noise has become noticeably louder through a window that previously felt quiet, the acoustic seal has likely degraded. Weatherstripping contributes meaningfully to sound attenuation alongside the glass unit itself; it is the physical barrier that prevents sound waves from travelling through the gap between sash and frame. how to reduce noise through windows without replacing glazing
Age of the Windows
Most window seals in uPVC windows have a serviceable life of around 10 to 20 years, depending on UV exposure, temperature cycling, and the cleaning products used. Homes with windows installed in the early-to-mid 2000s are now prime candidates for seal replacement, the windows themselves may be structurally sound, but the seals will have long since passed their optimal performance.
Practical tip, photograph any sections where the seal has pulled out of its groove before you start the replacement process. This gives you a clear reference for fitting the new seal correctly and helps you buy the right profile.
Types of Weatherstripping Used in UK Windows
Understanding which type of seal your windows use is essential before you can buy a replacement. Using the wrong profile will result in a poor seal, difficulty closing the window, or a seal that pulls out within weeks.
Bubble and Compression Seals
Bubble or compression seals are the most common type found in uPVC windows across the UK. Made from TPE (thermoplastic elastomer) or EPDM (ethylene propylene diene monomer) rubber, both flexible, weather-resistant materials, these seals feature a hollow or foam-filled tube that compresses when the window closes, creating an airtight barrier. They are found around casement windows and tilt-and-turn frames and are the most effective seal type for thermal performance.
Wiper and Fin Seals
Wiper or fin seals, including brush pile and rubber blade types, are typically found on sliding sash windows. The flexible blade or bristle pile wipes against the moving pane as it slides. This provides draught prevention. These are effective for air infiltration but less watertight than compression seals, making them more appropriate for windows that are sheltered from direct driving rain.
Foam Tape Seals
Foam tape seals are self-adhesive closed-cell or open-cell foam strips used as a low-cost, quick-fit solution. They are suitable for filling light gaps and are widely available from UK DIY retailers. However, they compress permanently over time and require more frequent replacement than moulded rubber seals, typically every two to four years rather than every decade. They are best viewed as a short-term fix rather than a permanent solution.
D, P, and E Profile Seals
Silicone and rubber D-seals, P-seals, and E-seals are named for their cross-sectional shape when viewed from the end. D-profiles suit narrower gaps; P-profiles provide a softer, fuller compression; E-profiles are designed for larger or irregular gaps. All are widely available from UK DIY retailers and specialist window suppliers. Matching the correct profile to your specific gap width is essential for a proper seal, a profile that is too large will prevent the window from closing fully, while one that is too small will leave gaps.
Co-extruded Seals for Timber Windows
Older timber-framed windows often use a different seal construction with a rigid carrier spine that slots into a routed channel in the frame. These co-extruded seals require careful matching to the original manufacturer’s specification, and it is worth contacting the original window manufacturer or a specialist timber window supplier if you are unsure.
Practical tip, if you are replacing seals on timber-framed windows and cannot identify the original supplier, bring a 75mm sample of the old seal to a specialist window hardware supplier rather than a general DIY store. They are far more likely to stock the correct co-extruded profile.
What to Look For When Choosing Replacement Weatherstrip
Choosing the right replacement seal requires a little preparation, but getting it right means the new seal will last for years rather than failing within months. Follow these steps in order for the best result.
- Identify your window type and frame material. uPVC, timber, and aluminium frames each use different seal profiles. Establish whether your existing seal sits in a groove (compression type) or is surface-adhered (foam tape type). This determines which replacement category to look in.
- Remove a short section of the old seal to take with you. Physically matching the cross-sectional profile at your DIY retailer or online supplier is far more reliable than guessing from a photograph. Cut a clean section approximately 50 to 75mm in length from a straight part of the seal.
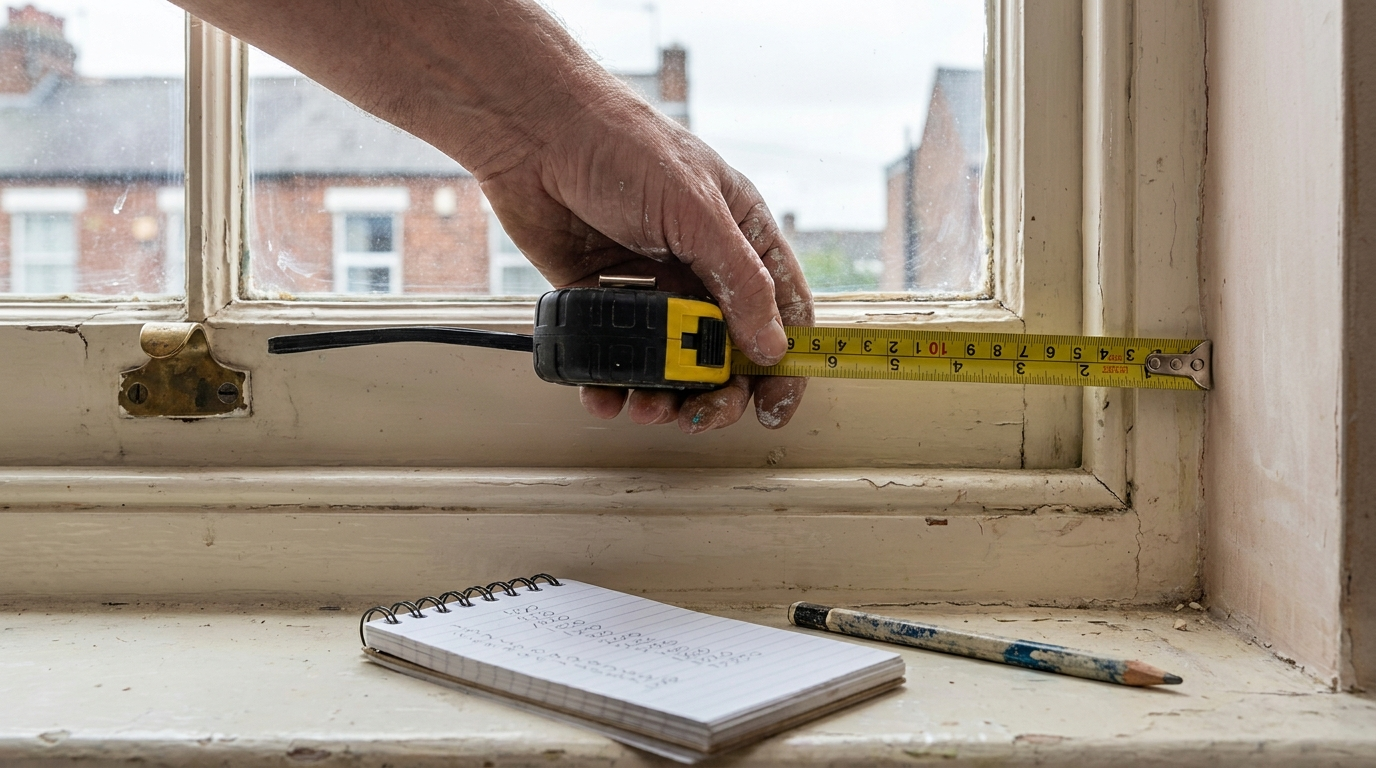
- Measure the gap you need to fill. Close the window and use feeler gauges or a thin ruler to measure the gap between the sash and frame. This determines whether you need a slim P-profile or a fuller bubble seal, a difference of just 2mm in gap width can mean the difference between profiles.
- Check the material specification. For UK climates, EPDM rubber and TPE outperform basic PVC seals in UV resistance and cold-weather flexibility. Avoid cheap PVC-only products that will harden and crack within a few years, particularly on south-facing windows with high UV exposure.
- Consider the colour. Most UK uPVC windows use white or grey seals; brown seals are common in woodgrain-effect uPVC frames. Choosing the wrong colour will affect the finished appearance even if the seal performs well functionally.
- Buy slightly more than you need. Allow a 10 to 15 percent overage on your measured perimeter length to account for cuts, corners, and any adjustments during fitting. It is far better to have a small amount left over than to find yourself 200mm short on the final run.
Practical tip, EPDM rubber seals from reputable UK suppliers typically cost between £1.50 and £3.50 per metre. If an online listing is significantly cheaper than this, it is likely to be basic PVC that will not last. Buy from a named UK window hardware supplier rather than an anonymous marketplace listing.
Tools and Materials You Will Need
One of the appealing aspects of window weatherstrip replacement is how little equipment it requires. There are no power tools involved, no specialist trade skills needed, and the entire toolkit for a typical job costs less than £20 if you need to buy everything from scratch.
Basic Hand Tools
- Sharp trimming knife or scissors, for cutting seal lengths cleanly
- Flat-bladed screwdriver or dedicated seal removal tool, for prying old groove-fitted seals free
- Tape measure, for measuring perimeter lengths and gap widths
- Mild soapy water solution in a spray bottle, for lubricating groove-fitted seals during installation
- Clean dry cloths, for wiping down surfaces before and after cleaning
Specialist Items Worth Having
A seal insertion tool, a small plastic or metal wedge-shaped tool available from window hardware suppliers for under £5, pushes the seal spine into its groove without tearing the material. It makes the job significantly easier, particularly on longer runs or tight-fitting profiles. A heat gun or hair dryer is also useful for softening stiff replacement seal material, which makes it far easier to work around corners without kinking or tearing.
Cleaning Materials
Isopropyl alcohol (IPA) wipes or spray are essential for degreasing the groove or frame surface before fitting any adhesive-backed seal. Even a thin film of grease or silicone residue from previous cleaning will prevent the adhesive from bonding correctly. Do not use bleach-based cleaners on rubber seals, bleach accelerates rubber degradation and will shorten the life of the new seal significantly.
Safety Considerations
This is a safe DIY task for most homeowners. No power tools are required and there is no electrical or gas work involved. The one genuine safety consideration is working at height on upper-floor windows, always use a stable ladder rated for your weight, ensure it is properly footed, and ideally ask a second person to foot the ladder while you work. ladder safety for DIY home improvements
Practical tip, gather all tools and materials before you start. Stopping mid-job to source a missing item means the window may be left partially dismantled in poor weather.
Step-by-Step Guide to Replacing Window Weatherstrip
The process for replacing window weatherstripping follows the same logical sequence regardless of window type. Work methodically around each window rather than trying to rush, and complete one window fully before moving to the next.
- Prepare the window. Open the window fully to give yourself clear access to the entire frame rebate. Clean the channel or rebate with a damp cloth to remove dust, dead insects, and loose debris, then dry it thoroughly. Remove any paint overspill, hardened sealant residue, or mould using a plastic scraper, avoid metal tools on uPVC frames as they can scratch the surface.
- Remove the old seal. For groove-fitted compression seals, use a flat-bladed screwdriver to pry one end free from the groove, then pull the seal firmly and steadily along its full length. Work at a low angle to avoid tearing. For adhesive foam tape seals, peel the tape away slowly, pulling at too sharp an angle tears the foam and leaves residue. Once removed, use IPA to clean away all adhesive residue.
- Clean and degrease. Wipe down the entire groove or bonding surface with isopropyl alcohol and allow it to dry fully before proceeding. This step is particularly important for adhesive seals, even a small amount of residual grease or moisture will prevent the new seal from bonding correctly and it will peel away within weeks.
- Cut the new seal to length. Measure and cut each side of the window perimeter separately rather than trying to run one continuous length around corners. A 45-degree mitre cut at each corner provides a neater finish and ensures better seal continuity at the joins. Use a sharp trimming knife against a metal rule for the cleanest cut.
- Fit the new seal. For groove-fitted seals, lightly spray the groove with soapy water, this acts as a lubricant and makes pressing the seal in significantly easier. Start at one corner and press the seal spine firmly into the groove using your fingers and the insertion tool, working steadily along the run. The critical rule here is to avoid stretching the seal as you work, if you pull it tight around corners, it will spring back and pull out of the groove once fitted. Leave a small amount of slack at corners instead.
- Test and adjust. Close the window fully and check that the seal compresses evenly around the entire perimeter. Look for any sections that are not making consistent contact with the sash. Apply the paper test, hold a single sheet of paper between the closed sash and the frame, then pull it gently. It should offer a slight, consistent resistance. If it slides freely, the seal is not compressing at that point and needs repositioning.
Practical tip, if the seal pulls out at corners after fitting, apply a small drop of contact adhesive to the mitre joint and hold it in place for 30 seconds. Do not rely on contact adhesive for the main seal run, but it is very effective at securing corner joints.
Comparing Weatherstrip Types at a Glance
Choosing between seal types is much easier when you can compare their characteristics directly. The table below summarises the key attributes of the most common weatherstrip options available to UK homeowners.
| Seal Type | Best Window Type | Approx. Cost Per Metre | Typical Lifespan | DIY Difficulty | Key Advantage |
|---|---|---|---|---|---|
| EPDM Compression Bubble Seal | uPVC casement, tilt-and-turn | £1.50 to £3.50 | 10 to 20 years | Moderate | Excellent thermal and acoustic performance |
| TPE Compression Seal | uPVC and aluminium frames | £2.00 to £4.00 | 10 to 15 years | Moderate | Good UV resistance and flexibility in cold weather |
| Brush Pile Wiper Seal | Sliding sash windows | £1.00 to £2.50 | 5 to 10 years | Easy | Allows smooth sliding action while blocking draughts |
| Self-Adhesive Foam Tape | Any frame, light gaps | £0.50 to £1.50 | 2 to 4 years | Very Easy | Lowest cost, no tools needed |
| Silicone P-Seal or D-Seal | Timber and older aluminium | £1.50 to £3.00 | 8 to 15 years | Easy to Moderate | Versatile profile range suits irregular gaps |
| Co-extruded Timber Seal | Traditional timber sash, casement | £2.50 to £5.00 | 10 to 20 years | Moderate to Difficult | Purpose-designed for original timber frame channels |
The table below provides a quick cost comparison for a typical 3-bedroom semi-detached home with eight opening windows, assuming a perimeter seal length of approximately 5 metres per window and a 15 percent material overage.
| Seal Type | Material Cost for 8 Windows | DIY Labour Cost | Professional Fitting Estimate | Recommended For |
|---|---|---|---|---|
| EPDM Compression Seal | £70 to £160 | Nil | £200 to £400 | Most uPVC casement windows |
| Self-Adhesive Foam Tape | £25 to £70 | Nil | £150 to £300 | Quick fix or rental properties |
| Brush Pile Wiper Seal | £45 to £115 | Nil | £200 to £350 | Sliding sash windows throughout |
| Silicone P or D Seal | £70 to £140 | Nil | £200 to £380 | Timber or older aluminium frames |
Practical tip, if you are sealing all the windows in your home at once, buying weatherstrip in a 50-metre or 100-metre roll rather than short retail packs will reduce your cost per metre significantly. Most UK window hardware suppliers offer bulk rolls online.
When DIY Is Not Sufficient and Professional Help Is Needed
Window weatherstrip replacement is one of the most accessible DIY tasks available to UK homeowners, but there are situations where a professional should be involved. Knowing when to call in a specialist avoids making a problem worse or missing an underlying issue that simple seal replacement will not fix.
If the window frame itself has warped, cracked, or dropped out of square, all relatively common in timber-framed homes with decades of thermal movement, no amount of new weatherstripping will create an effective seal. A warped frame needs adjustment or replacement before new seals are fitted. Similarly, if moisture is appearing between the double-glazed panes themselves, this indicates a failed sealed unit rather than a weatherstrip problem, and the glazing unit will need replacing. how to tell if your double glazing needs replacing
For uPVC windows, if the hinges or locking mechanism are worn to the point where the sash no longer sits squarely in the frame, fitting new seals will not compensate for the misalignment. A window hardware specialist can replace hinges and adjust the frame geometry before you fit new seals.
Any professional you engage for window work should hold TrustMark registration, the government-endorsed quality scheme for home improvement tradespeople. You can verify registration at the TrustMark website. For window installations or significant frame repairs, installers should also be FENSA or CERTASS registered, which ensures the work meets building regulations. Always obtain at least three quotes and ask each tradesperson to explain in plain language what work they are proposing and why. how to find a trustworthy window installer in the UK
Practical tip, if you are unsure whether your windows need seal replacement alone or more significant work, ask a FENSA-registered window company to carry out a free assessment before committing to any expenditure. Most reputable companies will provide an honest assessment at no charge.
Making Your Window Improvements Last
Fitting new weatherstripping is straightforward, but maintaining it correctly will determine whether it lasts five years or twenty. A small amount of ongoing care makes a significant difference to seal longevity, particularly in the UK’s combination of cold winters, wet autumns, and periods of intense summer UV exposure.
Clean rubber seals two to three times per year using a mild soapy water solution and a soft cloth. Avoid abrasive cleaners, bleach-based products, and solvent cleaners, all of which degrade rubber over time. Once or twice a year, apply a small amount of rubber conditioner or silicone spray to compression seals to keep them supple. This is particularly important on south-facing windows where UV exposure is highest.
Inspect seals annually as part of a general window maintenance check, ideally in early autumn before the heating season begins. Catching a seal that is beginning to harden or pull free in September means you can replace it before the cold weather arrives, rather than living with draughts through winter. annual home maintenance checklist for UK homeowners
It is also worth checking the window’s locking mechanism and hinges during your annual inspection. A window that does not close fully or sit square in its frame will compress its seals unevenly, causing premature wear on the side under most pressure. Adjusting hinges and ensuring the locking points engage correctly prolongs both the seal life and the window’s overall performance.
Window weatherstrip replacement is one of those rare home improvement tasks that delivers a genuine, tangible benefit for minimal investment. Done correctly, with the right seal profile and careful fitting, it restores a window to close to its original thermal and acoustic performance, without the cost or disruption of full window replacement. For most UK homeowners, it is one of the first things worth doing when trying to make a home warmer, quieter, and cheaper to heat.
Practical tip, keep a short offcut of the seal you install in each window, labelled with the window location, seal type, and supplier. When a seal fails in three or five years, you will have a perfect reference sample ready to match, rather than starting the identification process from scratch.
Frequently Asked Questions
Materials typically cost between £5 and £30 per window depending on seal type, profile size, and material — foam tape sits at the lower end while silicone or brush pile strips cost more. A full roll of EPDM rubber seal sufficient for several windows costs roughly £8 to £15 from DIY retailers. There are no labour costs if you do the job yourself, making this one of the cheapest draught-proofing measures available.
The correct type depends on your window design — casement windows commonly use a compression rubber or silicone bead fitted into a groove, while sash windows often use a brush pile strip along the meeting rail. The replacement must match the original profile in cross-section shape, width, and depth exactly. Take a sample of the old seal or note the channel dimensions before buying to avoid mismatches.
Most factory-fitted weatherstripping lasts between 10 and 20 years, though cheaper foam seals may degrade in as few as 5 years depending on UV exposure and how frequently the window is opened. EPDM rubber and silicone profiles generally outlast foam tape significantly. Signs of failure include visible cracking, flattening, gaps when the window is closed, or a noticeable increase in draughts and outside noise.
Like-for-like weatherstrip replacement on existing windows is considered routine maintenance and does not require building regulations approval or planning permission in England, Wales, or Scotland. If you are replacing the entire window unit rather than just the seal, Part L of the Building Regulations applies and the new window must meet minimum thermal performance standards. Always confirm with your local authority if you are unsure about the scope of your work.