Britain’s housing stock is one of the oldest in Europe, and millions of UK homes still have their original timber windows, many of them single-glazed, poorly sealed, and quietly haemorrhaging heat every time the temperature drops. If you’ve ever sat near an old window on a cold evening and felt a persistent chill despite the heating being on, you’ll know exactly how uncomfortable and costly uncontrolled air leakage can be.
You can stop draughts coming through old windows without replacing them by fitting brush pile or foam draught strips, applying flexible sealant around the frame perimeter, and installing secondary glazing for maximum performance. DIY materials cost as little as £5 per window, while professionally installed secondary glazing runs from £200 to £600 per window, far less than the £800 to £1,500 typically charged for full replacement double glazing. The most important thing to remember is to seal only uncontrolled gaps and never block trickle vents or background ventilators, which are deliberate and necessary airflow openings. The Great British Insulation Scheme closed on 31 March 2026. It funded insulation measures only and never covered windows or glazing.
- Use self-adhesive foam or brush pile draught strips to seal gaps around sash and casement windows — materials cost as little as £5 per window from DIY retailers
- Apply flexible frame sealant to cracks between the window frame and surrounding masonry, focusing on the outer perimeter where most cold air enters
- Choose brush pile seals over foam strips for sliding sash windows, as foam compresses and fails faster under repeated movement
- Install secondary glazing for the most effective non-replacement solution — professionally fitted units cost £200 to £600 per window versus £800 to £1,500 for full replacement double glazing
- Never seal trickle vents or background ventilators — these are deliberate airflow pathways required for healthy indoor air quality and in some cases building regulations compliance
- Get 3 quotes from reputable installers if considering secondary glazing, and check whether your property is a listed building or in a conservation area before making any changes
- The Great British Insulation Scheme closed on 31 March 2026. It funded insulation measures only and never covered windows or glazing.
- Understanding Draughts Through Old Windows
- How Much Heat and Money Are Draughty Windows Actually Costing You
- How to Find Where the Draughts Are Coming From
- The Best Draught-Proofing Products for Old Windows
- Step-by-Step Guide to Draught-Proofing Your Windows
- Special Considerations for Timber Sash Windows
- Secondary Glazing as a Draught-Proofing Upgrade
- What Draught-Proofing Costs in 2026
- When Draught-Proofing Is Not Enough
- Grants and Support Available in 2026
The good news is that in most cases, you do not need to replace old windows to stop draughts. Targeted draught-proofing using self-adhesive strips, brush pile seals, flexible frame sealant, and secondary glazing can dramatically reduce cold air infiltration at a fraction of the cost of new windows. For a typical UK home, the materials cost between £5 and £50 per window depending on the method chosen, and professionally installed secondary glazing, the most comprehensive non-replacement option, typically costs £200 to £600 per window compared to £800 to £1,500 or more for full replacement double glazing.
Understanding Draughts Through Old Windows
A draught through a window is uncontrolled air infiltration, cold outside air finding its way through gaps, cracks, worn seals, and deteriorated materials around the window frame, sash, or glazing. This is distinct from ventilation, which is deliberate and controlled airflow that your home actually needs to stay healthy. Trickle vents, deliberately opening a window, and background ventilators all allow fresh air in on your terms. A draught is the opposite, air coming in when and where you don’t want it, carrying heat out with it and making rooms feel cold even when the heating is working hard.
Understanding this difference matters because some homeowners go too far in the other direction, sealing up every gap they can find including ventilation openings that are there for a reason. The goal of draught-proofing is to eliminate uncontrolled gaps while leaving deliberate ventilation pathways intact.
Where Draughts Enter Old Windows
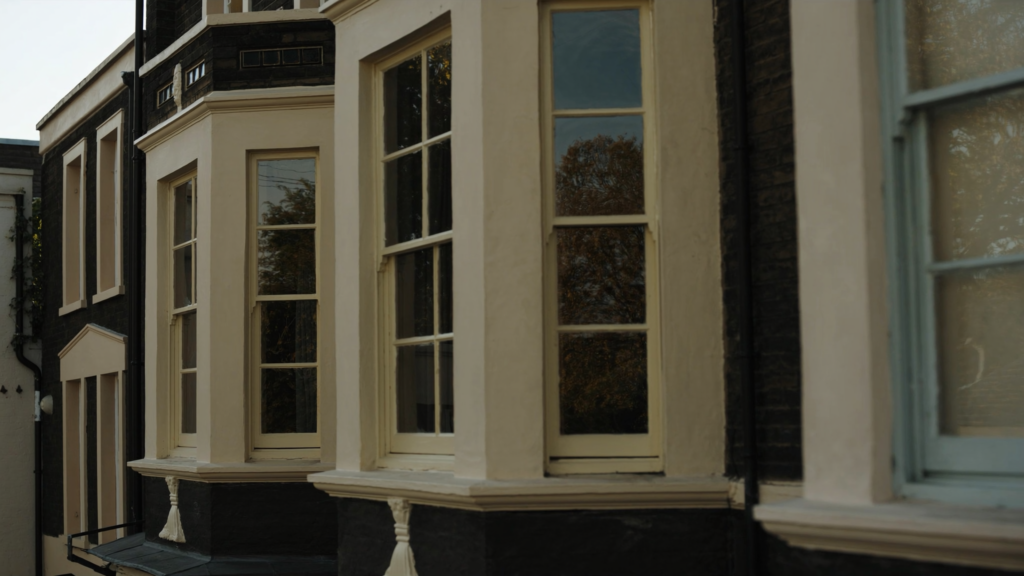
Old windows have several predictable weak points. In timber sash windows, the style found in the vast majority of Victorian and Edwardian properties across the UK, the gaps between the moving sash and the fixed frame are the primary culprit. Over decades, timber shrinks, swells, and warps, and the draught strips (if they were ever fitted at all) wear away or fall out entirely. The meeting rail, the horizontal point where the top and bottom sashes overlap in the middle, is often the worst single draught point in the whole window.
Beyond the sashes themselves, the joint between the outer window frame and the surrounding masonry wall is another major source of infiltration. This joint is known as the reveal joint, and when the flexible sealant that fills it dries out and cracks, which it does over time, it opens a continuous gap around the entire frame. Separately, the putty or glazing bead that holds the glass pane in place can dry, crack, and shrink over years of weathering, creating a path for air to move around the glass itself. And finally, the fitting points for locks, latches, and handles, any penetration through the frame, can allow air movement if not properly sealed.
Single-glazed and older timber-framed windows are by far the most common offenders, particularly in pre-1980s properties. According to the Energy Saving Trust, around 38% of UK homes were built before 1945, meaning a very large proportion of Britain’s housing stock is dealing with windows that were never designed with modern energy efficiency in mind.
Practical tip, before spending anything, note down which windows face the prevailing wind direction in your home. These will almost always be the worst performers and the highest priority for treatment.
How Much Heat and Money Are Draughty Windows Actually Costing You
Draught-proofing windows and doors is consistently rated by the Energy Saving Trust as one of the most cost-effective home improvements available, because the measures themselves are cheap and the heat loss being prevented is ongoing and significant.
It’s important to distinguish between two types of heat loss from a window. The first is conductive heat loss, heat moving through the glass and frame material from the warm interior to the cold exterior. This is the problem that double glazing addresses. The second is infiltration heat loss, actual warm air escaping through gaps and being replaced by cold outside air. Draught-proofing addresses this second type specifically, and the two are entirely separate problems. This means that even a single-glazed window can perform noticeably better once draught-proofed, because the cold air infiltration, which often contributes as much to perceived discomfort as the glass temperature itself, is eliminated.
Based on Energy Saving Trust guidance, draught-proofing windows and doors across a typical semi-detached house can save a meaningful amount on annual heating bills, with whole-house draught-proofing (including windows, doors, floors, and fireplaces) estimated to save in the region of £45 to £65 per year for a gas-heated home. For windows specifically, the savings are a proportion of this, but when measured against the low cost of materials, the payback period is typically just one to three heating seasons.
The broader context is equally important. The UK government’s energy efficiency policy direction in 2026 continues to push for improvements to existing housing stock before replacement, and preserving original timber windows, particularly in period properties, aligns with both conservation goals and household budgets. Replacing windows is a major expense: professional installation of double-glazed uPVC windows costs £800 to £1,500 per window for a typical casement, rising to £2,000 or more for timber replacements or large bay windows. For many homeowners, draught-proofing the existing windows is adequate and the right choice.
Practical tip, draught-proofing is most cost-effective when done as part of a wider programme of home improvements. If you’re already planning to redecorate or carry out external maintenance, build draught-proofing into the same visit to save time and disruption.
How to Find Where the Draughts Are Coming From
Before buying any products, you need to identify exactly where air is entering. Guessing and applying draught strip everywhere at random wastes money and can interfere with window operation. A few simple tests make the diagnosis straightforward.
The Hand Test
On a cold or windy day, close all your windows and run your bare hand slowly around the entire perimeter of each window, the frame edges, the sash edges, the meeting rail, the glazing bead, and the joint between the frame and wall. Move your hand slowly enough that you can feel a faint cool sensation if air is moving. Even a very small draught will be detectable this way because the temperature differential between indoor air and incoming cold air is significant in winter.
The Tissue or Incense Stick Test
For gaps that are too small to feel clearly, hold a lit incense stick (or a thin strip of tissue paper) a few centimetres from the suspected gap and watch for movement. Smoke drifting towards or away from the window, or tissue flickering, reveals air movement even where the gap is too narrow to feel by hand. This test works particularly well around glazing beads and lock penetrations where gaps are hairline-thin.
The Daylight Test
This one works in daylight with the interior as dark as possible, close the curtains or blinds in an adjacent room and look for light showing around the edges of a closed window. Visible daylight around a window edge is a reliable indicator of a gap large enough to cause significant draught problems and worth prioritising for treatment.
The Four Key Zones to Check
Whatever test method you use, apply it systematically to four zones on every window:
- Between the moveable sash or casement and the fixed outer frame (the primary opening seal)
- Between the outer frame and the surrounding wall, both inside and outside the reveal joint
- Around the glass itself where putty or glazing bead sits against the frame
- Around any lock, latch, or handle fitting where hardware penetrates the frame
Practical tip, photograph each draught point you identify before treating it. This gives you a before-and-after reference and helps you prioritise if you’re working through multiple windows over several weekends.
The Best Draught-Proofing Products for Old Windows
The draught-proofing product market in 2026 offers homeowners a range of options at different price points and durability levels. Choosing the right product for each application is more important than spending more money, the wrong product in the wrong location will either fail quickly or prevent the window from operating correctly.
Self-Adhesive Foam Strips
Self-adhesive foam draught strip is a compressible foam tape with a peel-and-stick backing, widely available in DIY stores and online. It is the most accessible and least expensive option, typically costing £2 to £6 per five-metre roll. Foam strip works by compressing when the window closes, forming a seal against the frame. It is best suited to casement windows (windows that are hinged at the side and swing open) where the gap between the opening sash and the frame is even and consistent all the way round.
The limitation of foam strip is durability. Cheap foam deteriorates relatively quickly, often within two to three years, particularly if the window is used frequently, as the repeated compression eventually collapses the cell structure and the foam loses its ability to spring back. For a window used daily, it is worth paying for a better-quality closed-cell foam or switching to a more durable material.
Rubber or Silicone Draught Excluder Strips
Rubber and silicone draught excluder strips in V-strip or P-strip profiles are a significant step up in durability from foam. These are pressed into the gap or channel between the sash and frame and spring back to fill the space rather than being permanently compressed. V-strip (also called tension seal) is particularly effective along the sides of sash windows and casement frames. Expect to pay £5 to £15 per five-metre roll for good-quality rubber or silicone strip, more than foam, but the product will typically last five to ten years with normal use.
Brush Pile (Mohair) Strips
Brush pile draught strip, often made from mohair or a synthetic equivalent, consists of a rigid carrier strip with a dense pile of fine fibres. It is particularly well-suited to timber sash windows where the sash slides up and down within channels, because the pile compresses as the sash moves without resisting the operation of the window. This allows you to draught-proof a sliding sash while still being able to open and close it normally, something that foam and rubber strips cannot achieve in this application. Brush pile strips are available from specialist sash window suppliers and some larger hardware retailers, typically at £8 to £20 per metre depending on pile height and quality.
Frame Sealant and Flexible Filler
Flexible frame sealant, a paintable silicone or acrylic-based sealant, is the correct product for the static joint between the outer window frame and the surrounding masonry wall. This is not a product for moving parts; it is for permanent joints that should never move. A tube of good-quality flexible frame sealant costs £5 to £12, and a single tube will typically treat several windows. The sealant is applied with a sealant gun, smoothed with a wetted finger, and left to cure (usually 24 hours before painting). Once cured, it can be painted to match the surrounding décor.
Practical tip, for timber frame-to-wall joints that are wider than 6mm, pack the gap with flexible backing rod (a foam rope available from builders’ merchants) before applying sealant. This prevents the sealant from sagging into a deep gap and ensures a neat, durable finish.
Step-by-Step Guide to Draught-Proofing Your Windows
Follow these steps in order for the most effective and lasting result. Rushing the preparation stages is the most common reason DIY draught-proofing fails prematurely.
- Clean and dry all surfaces thoroughly. Remove old, crumbling foam, dried sealant residue, and loose putty. Use a scraper or stiff brush, then wipe down with a damp cloth and allow to dry completely before applying any new product. Adhesive strips will not bond reliably to dusty, damp, or oily surfaces, and sealant applied over damp masonry will not cure correctly.
- Measure the gaps accurately before buying products. Use a tape measure or feeler gauge to determine the gap width at its widest and narrowest points. This determines whether you need thin foam (2 to 3mm compressed thickness), a medium brush pile strip (4 to 6mm), or a compression seal for larger or irregular gaps. Buying a product that’s too thick for your gap is a common and frustrating mistake.
- Cut strips to length before peeling and sticking. Always measure and cut draught strip to the exact length required before removing the backing paper and sticking it down. Apply each strip in one continuous run wherever possible, joins between pieces become weak points where air can still infiltrate. For corners, mitre the strip at 45 degrees or use a small off-cut to fill the corner gap.
- Apply sealant to static frame-to-wall joints. Using a sealant gun held at a 45-degree angle, run a continuous bead of flexible frame sealant along the entire reveal joint, inside and outside if accessible. Work in one direction without stopping. Immediately smooth the bead with a finger dipped in water (for acrylic sealant) or neat washing-up liquid (for silicone) to get a clean, slightly concave finish. Allow to cure fully per the manufacturer’s instructions, typically 24 hours, before painting over it.
- Test the window operation before declaring the job done. After fitting strips to moving sashes or casements, close and latch the window to confirm it operates correctly. The window should close firmly and latch without requiring excessive force. If the window is too tight to latch, trim the strip slightly with scissors or switch to a thinner profile. A window that cannot be properly closed and latched is not effectively draught-proofed regardless of how much strip you’ve applied.
- Re-check with the incense or tissue test. Repeat your original draught detection test after the sealant has cured and the strips are fitted. Work systematically around each window again. Mark any areas that still show air movement for a second pass, it is common to find that treating one draught point reveals a secondary gap that wasn’t apparent before.
Practical tip, work through your windows in priority order rather than trying to tackle the whole house at once. Start with the windward-facing windows and rooms that feel coldest, and you’ll notice an immediate difference that motivates you to continue.
Special Considerations for Timber Sash Windows
Timber sash windows present more complex draught-proofing challenges than casement windows because they have multiple interacting moving parts, top sash, bottom sash, meeting rail, and the pulley housings that conceal the counterweights. Each of these is a potential draught point requiring a slightly different approach.
The Meeting Rail
The meeting rail, the horizontal overlap point where the top and bottom sashes meet in the closed position, is usually the worst draught point on a sash window. A brush pile strip applied to the meeting rail of the lower sash is the standard and most effective solution. The strip presses against the inner face of the upper sash when the window is closed, forming a seal without impeding the sliding operation of either sash.
Staff Beads and Parting Beads
Staff beads are the internal timber strips that run vertically on either side of the lower sash, keeping it in its channel. Parting beads are the narrower strips that separate the upper and lower sash channels in the middle. Over time, these beads wear down, split, or are removed and never replaced, creating open channels through which air flows freely. Replacing worn staff beads and parting beads is a relatively straightforward carpentry task, and the difference it makes to draught performance can be dramatic. Pre-cut timber beads are available from specialist sash window suppliers and some timber merchants.
Pulley Housing Gaps
The pulley housings at the top of the sash frame are a draught source that many homeowners overlook. The gap around the pulley wheel can allow a direct airflow from the box frame cavity, which is itself often ventilated to the outside, into the room. Small pieces of brush pile strip or foam can be carefully fitted around the pulley housing to seal this gap without affecting the sash rope or cord.
Listed Buildings and Conservation Areas
Timber sash windows in listed buildings or within designated conservation areas may be subject to restrictions on alterations that affect their appearance. However, internal draught-proofing using brush strips, sealant, and bead replacement is almost universally acceptable without planning permission, because it does not affect the external appearance of the window. If you are unsure about your property’s planning constraints, it is worth a brief call to your local planning authority before carrying out any work, they are generally helpful and the conversation takes a few minutes.
Practical tip, specialist sash window draught-proofing companies exist across the UK and offer a professional service that includes stripping out the sashes, fitting new beads and brush strips, and reinstating the sashes, all without replacing the windows. For a badly deteriorated sash window, this can be more cost-effective than a full DIY approach and typically costs £200 to £400 per window.
Secondary Glazing as a Draught-Proofing Upgrade
Secondary glazing is a second pane of glass or clear acrylic fitted to the interior face of the existing window reveal, entirely separate from the original window, and it is the most comprehensive non-replacement solution available to UK homeowners who want to address both draughts and thermal performance simultaneously.
It is worth being clear about what secondary glazing is and is not. Secondary glazing means a separate inner panel fitted behind the original window, creating a still-air gap between the two. Double glazing means replacing the original window entirely with a sealed double-glazed unit. Double glazing retrofit (sometimes called secondary double glazing) means fitting a new sealed double-glazed unit within the original outer frame. Secondary glazing is the only one of these three options that leaves the original window completely untouched. That makes it the default choice for listed buildings and conservation areas, and often the most practical choice for any period property where the original windows are worth preserving.
Secondary Glazing Options in 2026
The range of secondary glazing available to UK homeowners in 2026 covers a wide spectrum of cost and permanence:
- DIY magnetic secondary glazing film kits, a clear film on a thin magnetic frame that attaches to a self-adhesive magnetic strip fitted to the window reveal. These can be removed and re-fitted seasonally. Cost starts from approximately £15 to £30 per window, making them accessible for virtually any budget.
- Removable acrylic or polycarbonate panel kits, slightly more rigid than film kits and better at maintaining a consistent air gap. Typically £30 to £80 per window for a DIY system.
- Professionally installed hinged or sliding secondary glazing panels, aluminium-framed glass panels that open independently of the original window. This allows full window operation. These offer the best thermal and acoustic performance and are the system typically specified for listed buildings. Cost ranges from £200 to £600 per window depending on size and specification.
Secondary glazing addresses both draught infiltration and conductive heat loss through single-glazed panes, because the still-air gap between the two panes acts as thermal insulation in the same way that the gas-filled gap in a double-glazed unit does. It also provides significant acoustic benefits, the wider the air gap (typically 50mm to 100mm for professionally installed systems), the greater the noise reduction.
The Great British Insulation Scheme closed on 31 March 2026. It funded insulation measures only and never covered windows or glazing. Check with your local council and an approved TrustMark-registered installer for current eligibility in your area.
What Draught-Proofing Costs in 2026
The following table provides a clear comparison of the main draught-proofing methods available to UK homeowners, covering typical 2026 costs, durability, and suitability.
| Method | Typical cost per window (DIY materials) | Typical cost per window (professional) | Expected lifespan | Best suited to |
|---|---|---|---|---|
| Self-adhesive foam strip | £2 to £8 | Included in whole-house service | 2 to 4 years | Casement windows, infrequently used windows |
| Rubber or silicone V-strip or P-strip | £6 to £20 | Included in whole-house service | 5 to 10 years | Casements, hinged windows |
| Brush pile (mohair) strip | £10 to £25 | £200 to £400 (specialist sash service) | 10 to 20 years | Timber sash windows |
| Flexible frame sealant (reveal joint) | £5 to £15 | Included in whole-house service | 8 to 15 years | All window types, frame-to-wall joint only |
| DIY secondary glazing film or panel | £15 to £80 | Not applicable | 3 to 7 years | All window types, adds thermal benefit |
| Professionally installed secondary glazing | Not applicable | £200 to £600 | 20 to 30 years | Listed buildings, period properties, high-traffic rooms |
For context, a professional whole-house draught-proofing service, covering windows, doors, floors, and other gaps, typically costs in the region of £80 to £200 for a semi-detached home when carried out by an energy efficiency company, based on Energy Saving Trust guidance ranges. This is considerably less than the cost of replacing even a single window.
Comparing Draught-Proofing Against Window Replacement
| Approach | Typical cost for a 3-bed semi (10 windows) | Addresses draughts | Addresses conductive heat loss | Preserves original windows |
|---|---|---|---|---|
| DIY draught-proofing strips and sealant | £50 to £200 | Yes | No | Yes |
| Professional draught-proofing service | £80 to £200 | Yes | No | Yes |
| DIY secondary glazing (film or panel) | £150 to £800 | Yes | Partially | Yes |
| Professional secondary glazing | £2,000 to £6,000 | Yes | Yes (significantly) | Yes |
| Full uPVC double glazing replacement | £8,000 to £15,000 | Yes | Yes (fully) | No |
These figures reflect 2026 market rates and will vary based on window size, condition, and installer. Always obtain at least three quotes from different companies before committing to any professional work.
Practical tip, if you are considering professional draught-proofing or secondary glazing, look for installers registered with TrustMark, the UK government-endorsed quality scheme for home improvement work. You can verify any installer on the TrustMark website before booking.
When Draught-Proofing Is Not Enough
Draught-proofing is highly effective, but it is honest to acknowledge its limits. If your windows have rotted timber frames, broken sash cords, cracked or missing glazing putty across large sections, or panes that are cracked or broken, then draught-proofing will need to be preceded by basic repair work, and in some cases, the repair cost may approach or exceed the cost of replacement, making a like-for-like replacement a reasonable decision.
Similarly, if your primary concern is thermal performance, reducing heat loss through the glass itself rather than around it, draught-proofing alone will not achieve the improvements that double glazing or professionally installed secondary glazing can deliver. Single-glazed glass has a U-value (a measure of how quickly heat passes through a material, where lower values mean better insulation) of approximately 5.6 W/m²K, compared to 1.2 to 1.6 W/m²K for a standard double-glazed unit and around 2.0 to 3.0 W/m²K for a single-glazed window with secondary glazing added. If heat-through-glass loss is your main problem, draught-proofing will help but won’t fully solve it. guide to secondary glazing options for period homes
The decision also depends on the overall condition and character of the property. For a Victorian terrace or Edwardian semi with attractive original timber sash windows in reasonable structural condition, draught-proofing and secondary glazing is nearly always the right first step, preserving the character of the property, avoiding the cost and disruption of replacement, and delivering meaningful energy savings. For a 1970s property with tired aluminium-framed single glazing, full replacement may represent better value in the long term. when to replace vs repair old windows
Practical tip, if you’re uncertain whether to repair and draught-proof or replace, commission an independent home energy assessment from an accredited domestic energy assessor (look for the DEA accreditation through schemes such as Elmhurst Energy or ECMK) before spending money either way. The assessment will give you an objective picture of where your heat losses are coming from and what improvements will deliver the best return.
Grants and Support Available in 2026
Draught-proofing measures are low enough in cost that most homeowners fund them directly, but it is worth knowing what support is available, particularly for households with lower incomes or homes with poor energy efficiency ratings.
The Great British Insulation Scheme closed on 31 March 2026. It funded insulation measures only and never covered windows or glazing. Eligibility is primarily based on the property’s Energy Performance Certificate (EPC) rating and the household’s income or benefit status. Check with your energy supplier or the Energy Saving Trust’s helpline for current eligibility criteria.
The ECO4 scheme (Energy Company Obligation, currently in its fourth iteration) supports energy efficiency improvements for low-income and vulnerable households, and may cover draught-proofing as part of a wider package of measures. Contact your energy supplier or local council’s home improvement team for more information.
Some local authorities run their own grant schemes or interest-free loan programmes for secondary glazing and other home energy improvements. These vary by area. The Energy Saving Trust’s website has a grants search tool that lets you check what is available in your postcode. complete guide to home energy grants in 2026
If you are having professional work carried out, including secondary glazing installation, always ensure the installer is registered with TrustMark, the government-endorsed quality scheme. TrustMark registration is a requirement for work to qualify under most government grant schemes, and it gives you recourse if the work is substandard. You can verify any installer on the TrustMark website at trustmark.org.uk. how to find a trustworthy home improvement contractor understanding EPC ratings and how to improve yours
Practical tip, always ask any contractor quoting for draught-proofing or secondary glazing work whether they are TrustMark registered, and verify this independently on the TrustMark website before signing any agreement or making any payment.
Stopping draughts through old windows does not require replacing them. In the vast majority of UK homes, a combination of brush pile seals, flexible frame sealant, rubber compression strips, and where appropriate secondary glazing will eliminate uncomfortable cold air infiltration, reduce heating bills, and preserve the character of period properties, at a small fraction of the cost of new windows.
The key is to diagnose carefully, choose the right product for each specific gap and window type, prepare surfaces properly, and test your results. Whether you tackle it as a weekend DIY project or bring in a professional, draught-proofing your old windows is one of the most straightforward and satisfying improvements you can make to a UK home, with results you’ll feel from the very first cold night after the job is done.
Frequently Asked Questions
DIY draught-proofing materials for a single window typically cost between £5 and £50 depending on the method — foam strips are cheapest at around £5 to £10 per window, while brush pile seal kits and flexible sealants run from £10 to £30. Professionally installed secondary glazing, the most thorough non-replacement option, costs £200 to £600 per window across most UK regions.
Yes, sliding sash windows can be effectively draught-proofed using brush pile seals fitted into the meeting rail, sash channels, and bottom rail — these allow the window to open and close while blocking uncontrolled air infiltration. A professional sash window draught-proofing service in the UK typically costs £100 to £250 per window and can reduce heat loss through the window by up to 86% according to Historic England guidance.
Draught-proofing is considered one of the most cost-effective home energy improvements available. The Energy Saving Trust estimates that draught-proofing windows and doors across a whole home can save a typical UK household around £45 to £60 per year on energy bills, with DIY material costs often recouped within a single heating season. In older homes with significant air leakage, savings can be considerably higher.
Brush pile seal systems are generally regarded as the best option for old timber windows, particularly sashes, because they tolerate movement and irregular frame shapes better than foam strips. For the frame-to-masonry junction, a low-modulus silicone or flexible acrylic sealant rated for exterior use is recommended, with products widely available from UK builders merchants for around £5 to £12 per tube.
Simple draught-proofing measures such as adding brush pile seals or secondary glazing inside a listed building usually do not require listed building consent, but you should always check with your local planning authority before proceeding. Historic England recommends secondary glazing as the preferred energy improvement method for listed buildings precisely because it is reversible and does not alter the original window fabric.